Big step taking the old mangle grinder to my inlet manifold but I thought nothing ventured nothing gained.
Going off memory a bit but the slice I took out was close to the picture below.
I then had the arduos task of trying to find someone to TIG the pieces back together... couldn't find anyone that would do it for me. Because the risers don't line up 100% none wanted to take the risk as they thought it may screw it up, even though pleading with them to have a bash they still wouldn't do it.
Did a lot of searching through google and found an article on chemical metal, it's basically like body filler but has metallic compound in it. I was sceptical and happen to mention it to a mate and he said he used on a restoration project a number of years ago to patch up and oil tank it has been solid since.
Mentioned it on the Haynes forum and I must be honest one or two guys did caution me on this product as it may create small beads inside the riser when you lay it on so I would recommend that you way up the risks of using it before you do. My decision was relative easy, as I plan to swap the engine out sometime in the future I'll only have the DOHC in there short term so thought I'd go for it.
Here are a few pictures of the manifold during the chemical metal application/sanding/primer stage.
first stage lay up of the chemical metal
couple of close ups
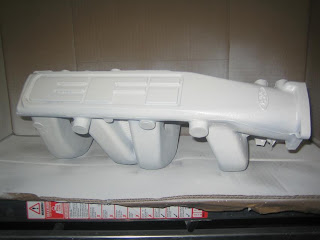
And this is the final article after hours of sanding, refilling etc... before and after primer
before primer
after primer


